Your next decision
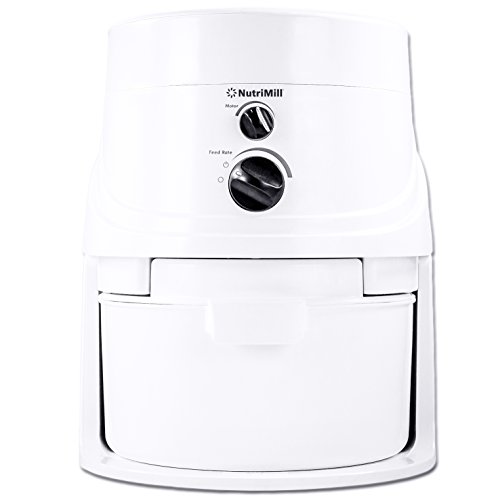
Compare the documented fit, complete setup and limitations for NutriMill Classic, WonderMill Electric, NutriMill Harvest.
See the model shortlist ↓| Before the first recipe batch | What to verify |
|---|---|
| Exact machine | Model, regional electrical rating, supplied manual and any transport-lock or first-use step |
| Grain | Food-grade identity, exact dry form and permission in the model documentation |
| Collection system | Correct bowl or canister, lid, separator, filter and tube; enough capacity for the planned batch |
| Record | Grain class or variety, input weight, setting, collected flour, sifted flour and relevant observations |
Choose one known grain for the first useful batch
Select one food-grade grain whose exact form appears in the current documentation for your model. For a wheat batch, record the full label—such as hard red winter or soft white—rather than “wheat.” The wheat-berry guide explains why hardness, bran color and growing season are separate clues rather than interchangeable names.
Use the compatibility checker to locate the model evidence, then consult the supplied manual. Permission for hard wheat does not automatically cover every prepared wheat product, and food-grade status does not establish machine compatibility.
Complete commissioning before measuring recipe flour
First-use instructions are model-specific. The WonderMill US manual requires at least 400 grams (also described as two cups) of wheat or another hard grain to be milled and discarded. NutriMill’s current Classic resource page provides a dedicated first-time-use guide. Follow the document for your exact revision rather than borrowing WonderMill’s discard amount or another machine’s sequence.
A required discard is commissioning material, not usable yield and not flour for tasting. Record the first subsequent batch intended for a recipe. If a used machine lacks its manual or complete collection parts, resolve that before treating it as ready for a food batch.
The compatibility checker separates documented permissions from unknown combinations.
Check your grain →Follow the exact loading and stopping order
WonderMill Electric and the referenced Mockmill 100/200 instructions require the motor to run before grain is added. Classic’s current product description uses a grain-first sequence. The KGM attachment has separate mixer, session and cooling instructions. These are different workflows, not competing versions of a universal loading rule.
WonderMill also says to let the empty mill run about five seconds after the hopper clears and not to stop it mid-cycle except for the documented emergency procedure. Never put fingers or utensils into a running mechanism. If the machine hums, binds, leaks flour or behaves abnormally, stop and use the troubleshooting guide and manufacturer support.
Measure a batch that answers a practical question
Tare the receiving bowl, weigh the grain input and keep the planned amount within the model’s capacity. Then weigh the flour collected. If you sift, record the unsifted total, flour retained for the recipe and material removed as separate figures.
For an arithmetic example only, 482 grams collected from 500 grams of grain is 96.4% collected yield. If 450 grams remain after sifting, usable yield for that recipe is 90%. Those values are not typical performance claims. Use the yield guide to calculate your own result and avoid comparing unlike sifted and unsifted batches.
Record the variables that can explain the next result
Save the exact grain identity, mill model, setting, input and output weights, whether flour was sifted, and the recipe outcome that matters to you. “Fine” is not a transferable number between different mills, and one successful batch does not validate every grain or setting.
The milling notebook stores these notes in the current browser profile and can export a JSON backup. It does not sync between devices or certify flour quality. Change one variable at a time on a later batch if you want the record to explain a difference.
Finish with raw-flour handling and exact-model cleanup
Milling raw grain into flour does not kill harmful bacteria. FDA advises against tasting raw flour, dough or batter and recommends keeping flour away from ready-to-eat foods, following cooking directions and cleaning work surfaces and utensils afterward.
Follow the mill’s own cleaning procedure after the machine stops and is unplugged. Removable collection parts and dry milling chambers may require different treatment. Keep the grain identity and milling date with leftovers, and use the storage guide rather than assuming the collection canister is long-term storage.
Questions answered
How do you mill wheat berries at home?
Choose a food-grade wheat class permitted by your exact mill, complete any model-specific first-use procedure, follow its loading order, and weigh the grain and flour. Keep the full wheat identity with the batch record.
Should I add grain before turning on the mill?
It depends on the exact model. WonderMill Electric and the referenced Mockmill manual say power first; the current Classic description says grain first. Follow your supplied manual.
Does the first flour from a new grain mill need to be discarded?
Only when the exact manufacturer instructions require it. The WonderMill US manual requires a first-use discard; do not transfer that amount or procedure to another model. Complete commissioning before measuring recipe yield.